
Quicktip for Texture Atlas Generator (Unwrap 3D Pro)
This quicktip will explain how to fix texture seams when using the Texture Atlas Generator tool.
Click File | Export | Texture Atlas Generator to run the texture altas generator tool and select a source model:
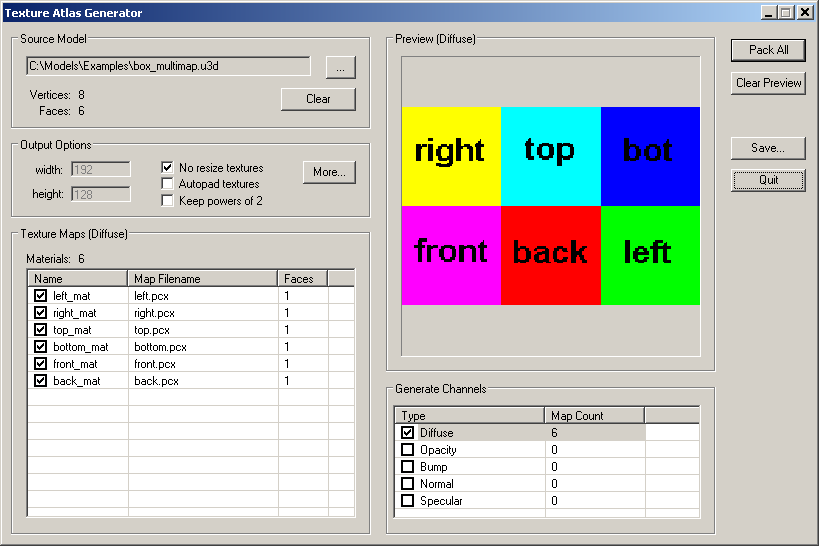
First of all, always check the No resize textures option, whenever possible. This will pack all textures using their original dimensions without resizing them. Keep powers of 2 is optional.
Secondly, any UVs near the 0 to 1 UV border should be reduced and padded to avoid seams. This is shown in our example file, box_multimap.u3d. The actual problem occurs after the texture is packed. Previously, UVs were clamped at the border, but, after the texture is packed, it's border UVs are now unclamped. Which means, it may blend into the border of its neighboring textures.
As a fix, you should reduce and pad any borderline UVs before packing them:
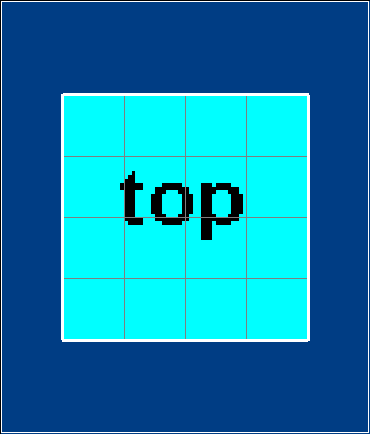 borderline UVs
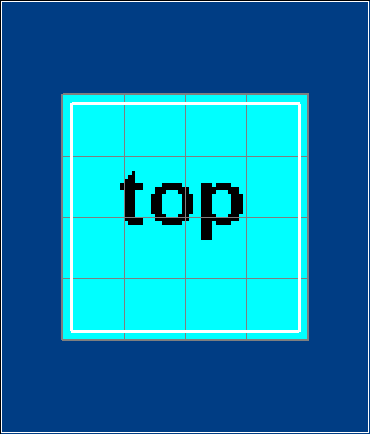 reduced and padded UVs
Doing this should prevent seams from appearing along the 0 to 1 UV border.
As a quicker alternative, you can check the Autopad textures option. This will automatically add padding to all textures whose UVs lie along the 0 to 1 UV border. The padding is then filled with border pixels, which should help eliminate seams when textures are packed.
That's it! If you have any other questions, please let us know.
Fixing Seams
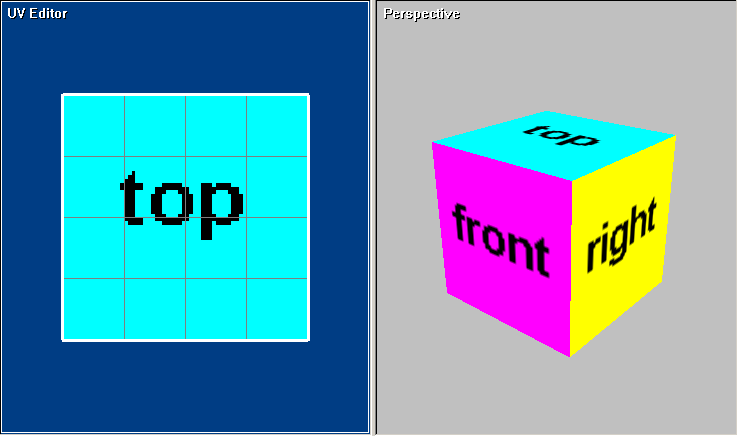
When using the the Texture Atlas Generator tool, there are some special cases where seams might appear on your model. Let's use the example file box_multimap.u3d that comes with Ultimate Unwrap3D to illustrate two points:Click File | Export | Texture Atlas Generator to run the texture altas generator tool and select a source model:
First of all, always check the No resize textures option, whenever possible. This will pack all textures using their original dimensions without resizing them. Keep powers of 2 is optional.
Secondly, any UVs near the 0 to 1 UV border should be reduced and padded to avoid seams. This is shown in our example file, box_multimap.u3d. The actual problem occurs after the texture is packed. Previously, UVs were clamped at the border, but, after the texture is packed, it's border UVs are now unclamped. Which means, it may blend into the border of its neighboring textures.
As a fix, you should reduce and pad any borderline UVs before packing them:
borderline UVsreduced and padded UVsDoing this should prevent seams from appearing along the 0 to 1 UV border.
As a quicker alternative, you can check the Autopad textures option. This will automatically add padding to all textures whose UVs lie along the 0 to 1 UV border. The padding is then filled with border pixels, which should help eliminate seams when textures are packed.
That's it! If you have any other questions, please let us know.