
Tutorial for Repainting Mesh UVs (Texture Transfer)
The Repaint Mesh UVs tool allows you to repaint the UVs between two different, but similar shaped meshes using a special texture baking technique. For example, the textures of a low detailed mesh can be repainted onto the UVs of a high detailed mesh, or vice versa. For this technique to work properly, both meshes must occupy the same location in worldspace.
Practical Example
Let's use the Repaint Mesh UVs tool to transfer the textures from Genesis 2 to Genesis 3 in Daz Studio.
If you're an user of Daz Studio, you should know the UVs of Genesis 2 and Genesis 3 models are incompatible, so the texture maps from Genesis 2 can't be used for Genesis 3, without modification. However, the models are similar enough, so we can repaint the mesh UVs to transfer the textures.
To begin, download and install these morphs for Daz Studio:
Texture_Conversion_Helper_Morphs.zip
If you don't see the morphs listed, restart Daz Studio. These morphs are essential for aligning and shaping the Genesis 2 and Genesis 3 models, so their vertices occupy the same location in worldspace.
Also, download and install the Unwrap 3D import/export plugin for Daz Studio.
In the next step, we will use these morphs to export two files from Daz Studio.
Prepare Genesis 2
In Daz Studio, load the Genesis 2 base character. In the parameters tab, slide Morphs | Tex_Converter_Prep to 100%. Set the mesh resolution level to Base. Then, export it to a U3D file. Call it gen2_base_morphed.u3d.


Now, clear all and reset the scene.
Prepare Genesis 3
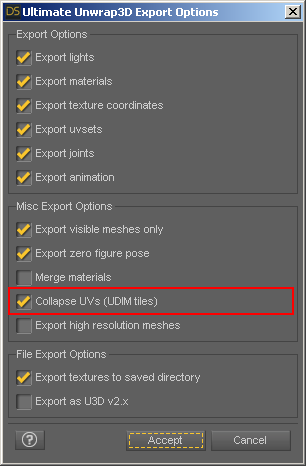
Load the Genesis 3 base character. In the parameters tab, slide Morphs | Tex_Converter_Prep to 100%. Set the mesh resolution level to Base. Then, export it to a U3D file. Call it gen3_base_morphed.u3d. With the release of Genesis 3, model UVs now use UDIM tiles, however these UVs are out-of-range for repainting. To fix, check the option called Collapse UVs (UDIM tiles), as we need all target UVs to be in the range of 0 to 1:
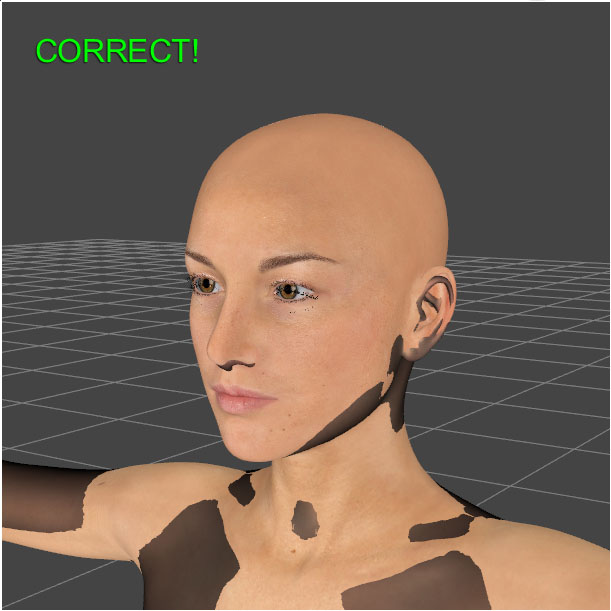
As a test, to make sure your morphs are working correctly, you can load both the Genesis 2 and Genesis 3 base characters into the same scene. After the morphs are applied, both models should overlap perfectly:
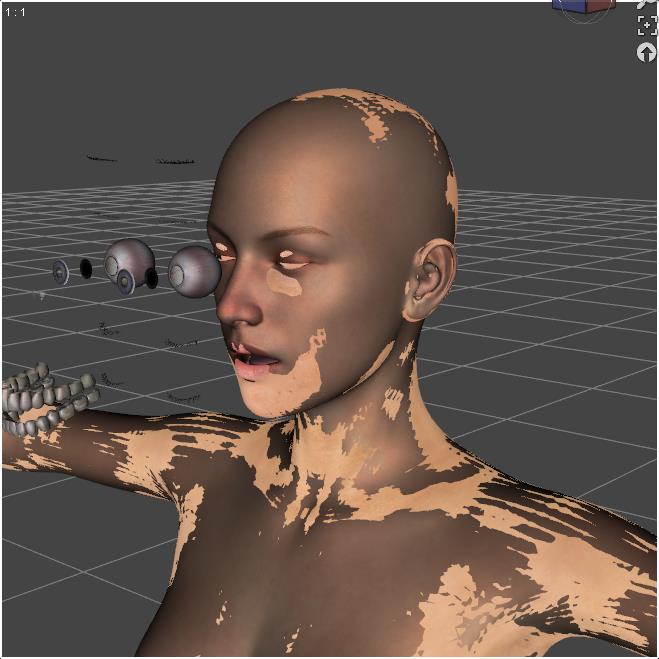
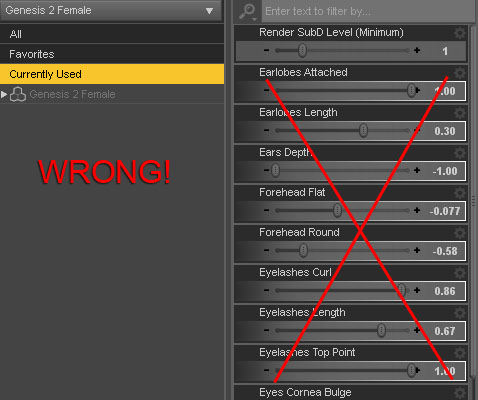
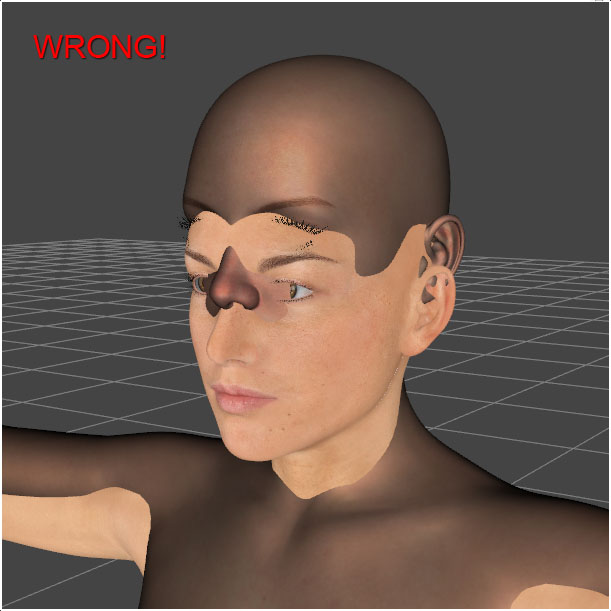
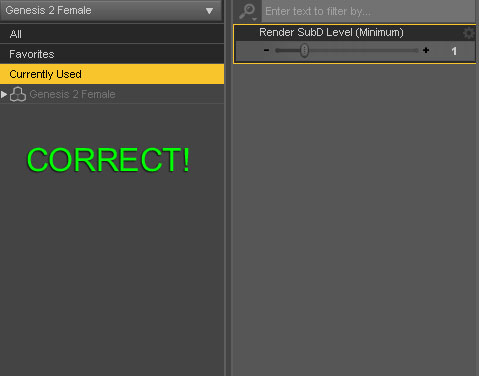
This step is surprisingly easy to get wrong, even for experienced Daz Studio users. If your models don't overlap perfectly, then you will get seams later on. Common mistakes are not clearing the scene, or having another model selected while loading another. If you discover your models don't overlap, click on the Currently Used section in your Parameters tab. There should be no morphs applied here. If you see any morphs listed, delete the entire scene, and start over.
Repainting UVs
Before we begin, uncheck Options | Preferences | Textures | Limit texture size. Otherwise, texture size may be limited when loading them.
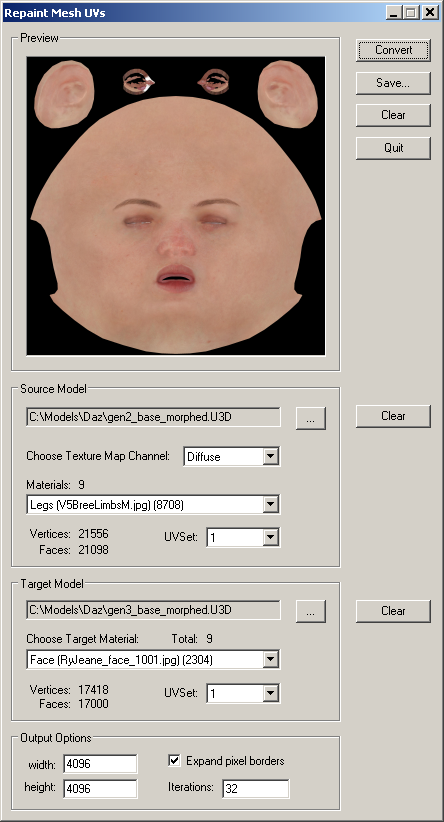
Now, we are ready for repainting. In Unwrap3D, click File | Export | Repaint Mesh UVs. Load gen2_base_morphed.u3d as the Source Model. Load gen3_base_morphed.u3d as the Target Model. Set the output width and height to 4096 x 4096. Set the iterations to 32 or greater, as we will be creating large textures.
Set the Target Material to the Face material. Then click the Convert button:
After repainting, save your results to file.
By default, the diffuse map is repainted, but we can also repaint other maps, such as bump, specular, and translucency. Set Choose Texture Map Channel to the desired texture map type, and repaint again.
Final Results
In Daz Studio, we can load the Genesis 3 base character. Then, clicking on the Surfaces tab, we can replace the appropriate maps with our repainted maps:
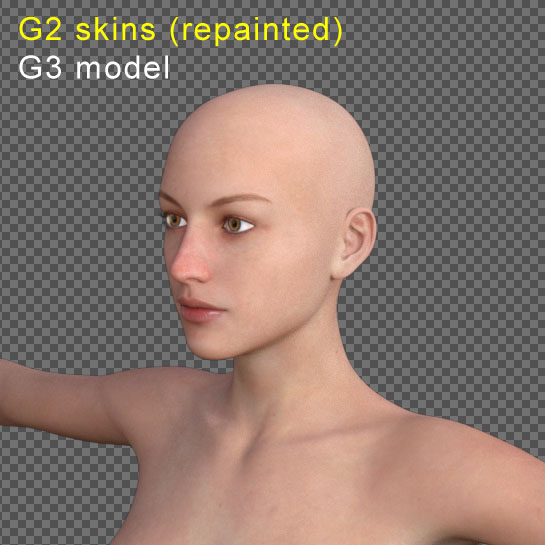
Compared to the original skins:
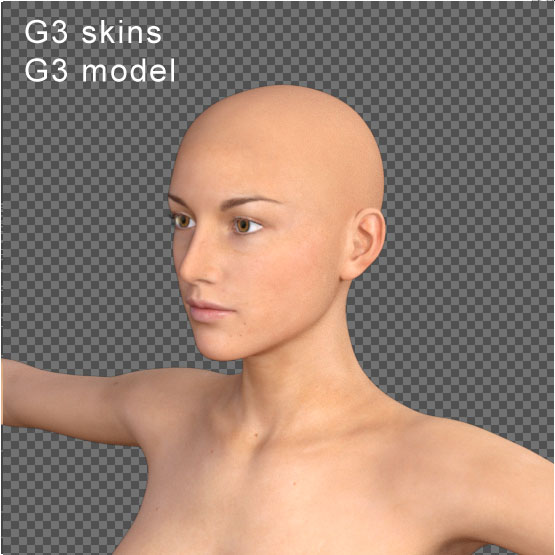
No seams are visible.
Troubleshooting Tips
- If your repainted texture is all black, then either your source model has no textures assigned to its materials, or your target model uses UDIM tiles and you forgot to collapse its UVs to 0 to 1.
- If you see seams after following this tutorial, then you didn't export your models from Daz Studio correctly. Go back to Daz Studio and start over.
Repainting Tips
- Make sure your UVs are not overlapping.
- Make sure your target UVs are in the range of 0 to 1.
- Make sure your meshes occupy the same location in worldspace.
- To speed up repainting, delete any unnecessary geometry.
That's it! If you have any other questions about repainting mesh UVs, please let us know.