
Tutorial 3 for Repainting Mesh UVs (Texture Transfer)
With the release of Genesis 9 from Daz Studio, both the UVs and mesh geometry have changed since the last generation. This quick tutorial will show how to repaint the UVs of any Genesis 8 model to Genesis 9.
To begin, download and install the Unwrap 3D import/export plugin for Daz Studio. Exporting to .U3D format from Daz Studio is recommended over other formats, such as .OBJ, as it saves extra texture channels, such as translucency.
Prepare Genesis 8
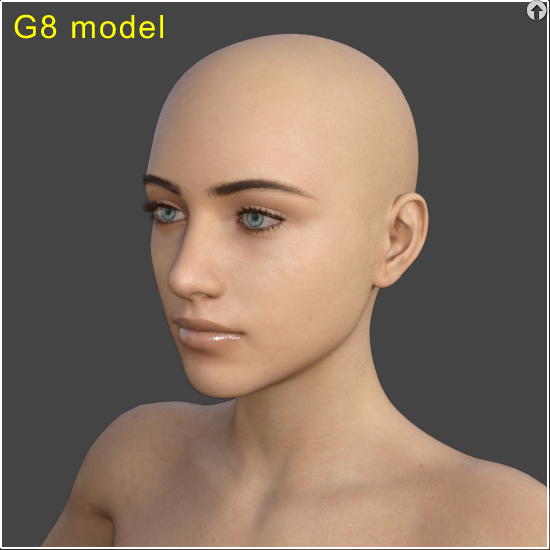
In Daz Studio, load the Genesis 8 base character. In the Parameters tab, set General | Mesh Resolution | Resolution Level to Base.

Click on the Currently Used section in the Parameters tab, and make sure no extra morphs are applied. For custom characters, set all head morphs and full body morphs to zero. At this point, you may apply a custom material set to the Genesis 8 base character for export.
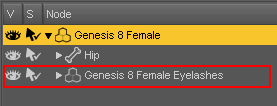
In the Scene tab, delete the Eyelashes mesh, found under the Genesis 8 figure.
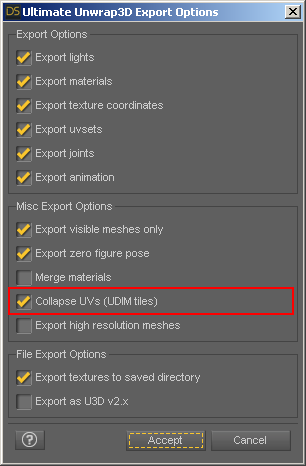
Now, export it to a U3D file. Call it gen8_base.u3d.
When exporting, check the option called Collapse UVs (UDIM Tiles). This is to ensure that UVs stay within 0 to 1:
Clear and reset the scene.
Prepare Genesis 9
In Daz Studio, load the Genesis 9 base character. Set the Resolution Level to Base.
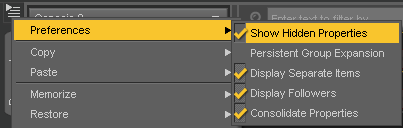
Before we can export, we must make preparations to the character's shape and pose, so they match the Genesis 8 character, as closely as possible. For the shape, we can use the built-in clone shape morphs that come with Daz Studio. These clone shapes are hidden, so first make the hidden properties visible in the Parameters menu pane:
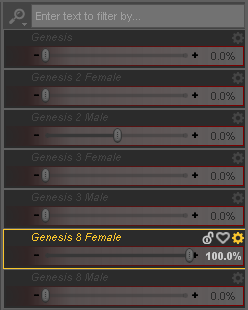
Now, in the Parameters tab, set Genesis 9 | Hidden | Clones | Genesis 8 Female to 100.
|
Important Note: It has been reported that the clone shape for G8F provided by Daz Studio is not 100% correct. Areas around the fingernails, toenails, navel, and chest area may not be perfectly aligned with the G8F figure at rest pose. However, these areas can be corrected either by adjusting the G9 skeleton, or by using custom morphs, before exporting the shape to file. For example, to correct the chest area using the G9 skeleton, try these joint adjustments: Left Pectoral: X Translate: -0.50 Y Translate: 1.85 Right Pectoral: X Translate: 0.30 Y Translate: 1.85 These areas may be easily overlooked as the Genesis 9 figure is using a gray-colored shader by default. It's recommended to apply a character skin shader to the Genesis 9 figure, so that areas of misalignment are more obvious. |
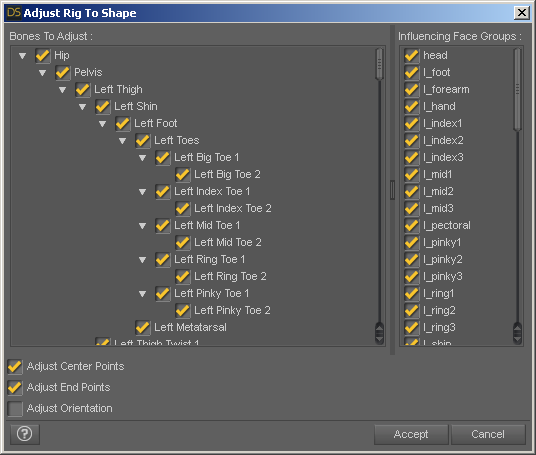
Before continuing, we must update the rigging so it fits the new clone shape, otherwise the joints will not bend the shape correctly when we change the pose. For example, click Tools | Joint Editor to see how the joints are now out-of-alignment. This is because the clone morph changed the shape, but not the rigging.
Select the Genesis 9 figure from the Scene Window and click Edit | Figure | Rigging | Adjust Rigging to Shape.... Use the default settings and click the Accept button.
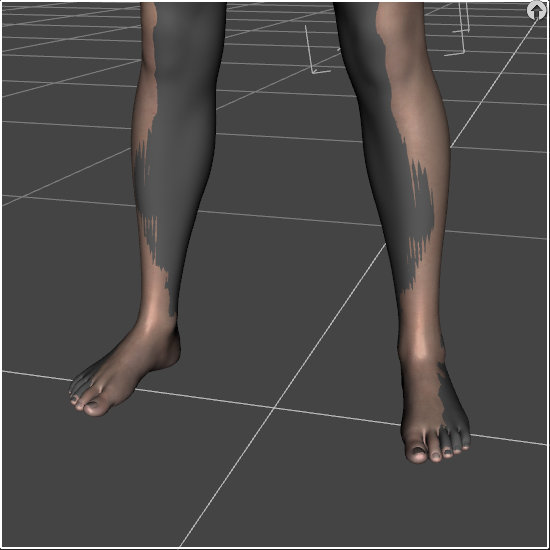
For the pose, load the Genesis 8 base character into the same scene, so we can compare its pose with Genesis 9. Set the Side-Side value of the left thigh and right thigh to 6.0 and -6.0, respectively (adjusted rigging required):
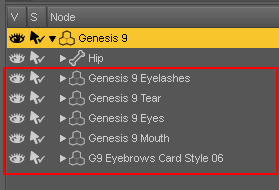
Now, delete the Genesis 8 character from the scene. Also delete all meshes under the Genesis 9 figure (eyelashes, tear, eyes, mouth, eyebrows):
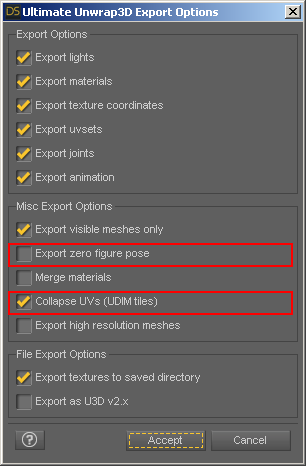
Now, export it to a U3D file. Call it gen9_as_gen8_shape.u3d. Check Collapse UVs (UDIM Tiles) and uncheck Export zero figure pose. This is to preserve our pose:
Repainting UVs
Before we begin, uncheck Options | Preferences | Textures | Limit texture size. Otherwise, texture size may be limited when loading them.
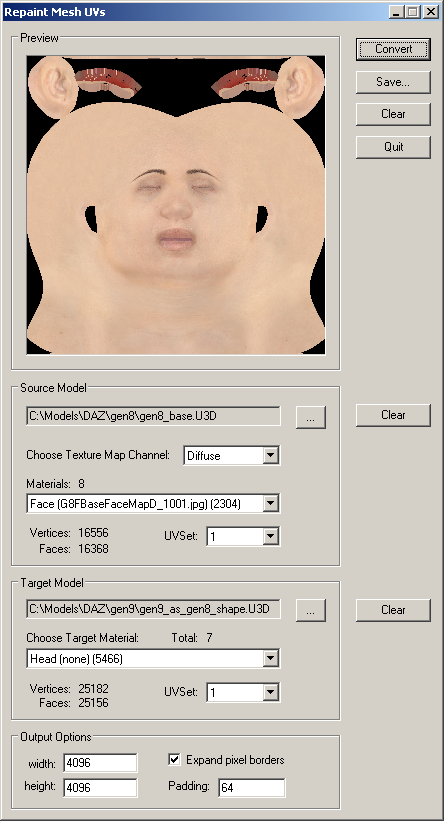
Now, we are ready for repainting. In Unwrap3D, click File | Export | Repaint Mesh UVs. Load gen8_base.u3d as the Source Model, and load gen9_as_gen8_shape.u3d as the Target Model. Set the output width and height to 4096 x 4096. Set the iterations to 32 or greater, as we will be creating large textures.
Set the Target Material to the Head material. Then click the Convert button:
After repainting, save your results to file.
By default, the diffuse map is repainted, but we can also repaint other maps, such as bump, specular, and translucency. Set Choose Texture Map Channel to the desired texture map type, and repaint again.
From here, we can continue repainting the head, body, arms, legs, fingernails, and toenails. A helpful tip to speed up repainting, is to deleted unnecessary geometry.
Final Results
In Daz Studio, we can load the Genesis 9 base character. Then, clicking on the Surfaces tab, we can replace the appropriate maps with our repainted maps:
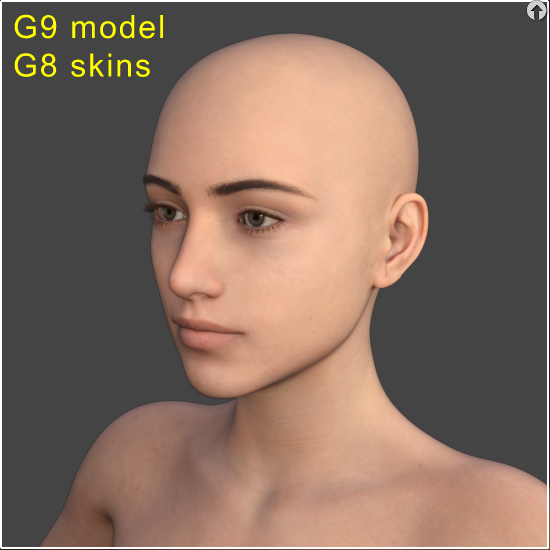
No seam lines are visible, so everything looks ok.
Note that Genesis 9 characters may be using a PBR skin shader, while Genesis 8 characters may be using a Iray Uber shader, so be aware, there may be color differences if you're applying the same texture using a different shader.
That's it! If you have any other questions about repainting mesh UVs, please let us know.