
Tutorial for Repainting Seams (Unwrap 3D Pro)
In the tutorial for Creating a Texture Atlas, we showed you how to use the repaint tool to create a texture atlas. In this tutorial, we will show you how to use the same repaint tool to fix your seams.
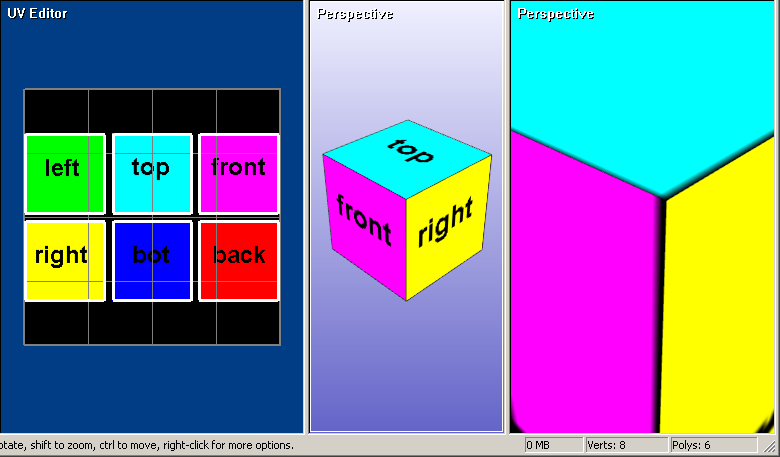
Seams Example
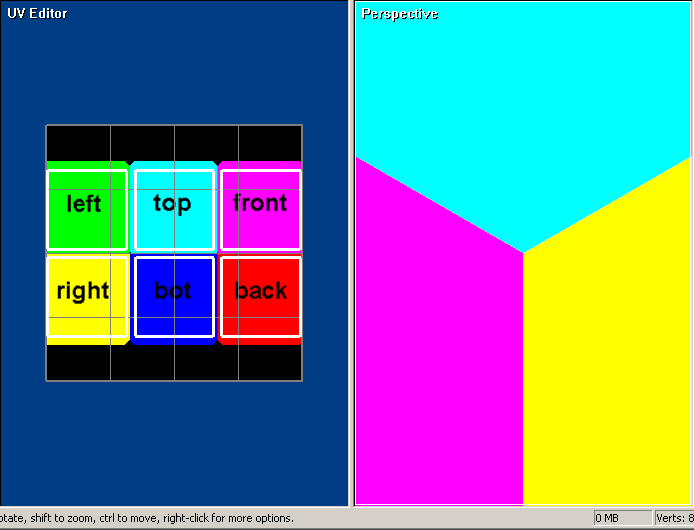
To prevent the seam from blending into the background color, it's usually best to overpaint it. This happens because the texture filtering mode of the rendering pipeline works by sampling adjacent pixels. Any pixels near the UV seam, including the background color, will get sampled. As shown below, the UV seam has not been overpainted, so black lines appear on the 3D model:
To fix this situation, we can expand the seam using the repaint tool.
Setup UVs
To begin, copy UVset 1 to UVset 2. From the main menu, click 2D Tools | Copy UVSets:
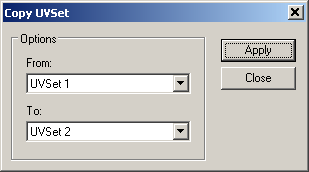
This will repaint our UVs from UVset 1 to UVset 2. Since we're not changing our UVs, we can keep them exactly the same as before.
Next, click File | Export | UV To Bitmap and select the Repaint color option. Under Repaint Options, make sure Expand pixel borders is checked. By default, iterations is set to 8. This will expand the seam by at least 8 pixels. For this example, let's increase it to 16.
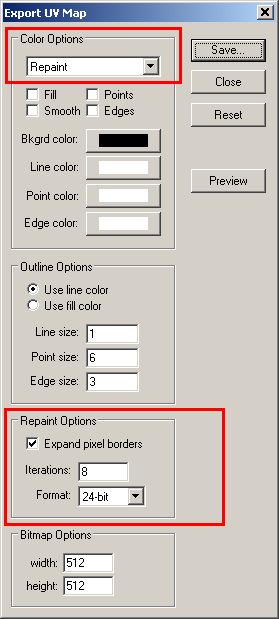
Click on the Save button to export your repainted UVs to a bitmap file. Call it repainted_layout.bmp.
Setup Repainted Texture
Now, replace your old texture with repainted_layout.bmp. Double-click on the material's name in the Scene Window to bring up the Material Editor. Under the Maps tab, and click on the Diffuse Properties button. Replace your old texture here.
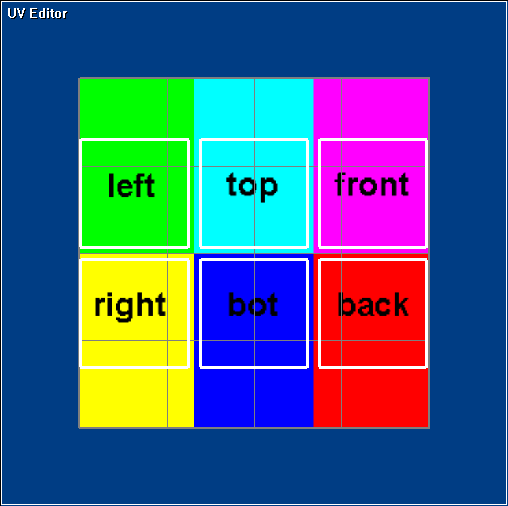
If everything went well, you should see your texture has been painted past the UV seam:
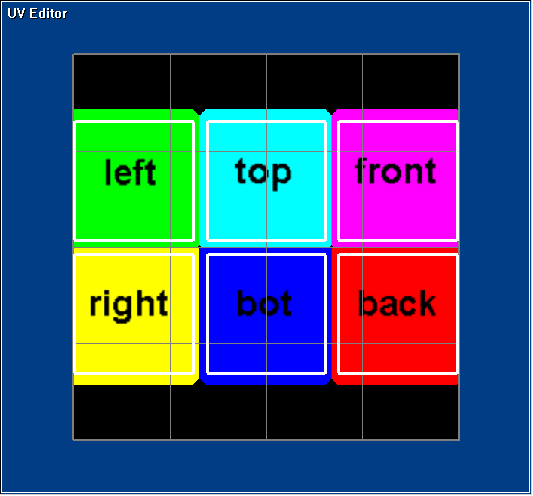
And the black lines on the 3D model are no longer visible:
For smaller textures below 1024x1024, a padding of 8 to 16 pixels is more than enough. But, for larger textures such as 4096x4096, it's recommended to increase the pixel padding to 32 or more pixels. But, if you want to fill in your entire texture, you can set the number of iterations to a high number, such as 100. The repaint tool is smart enough to exit early when there are no more empty pixels to fill:
Above, shows an example of a texture that has been fully overpainted.
Repainting Large Textures
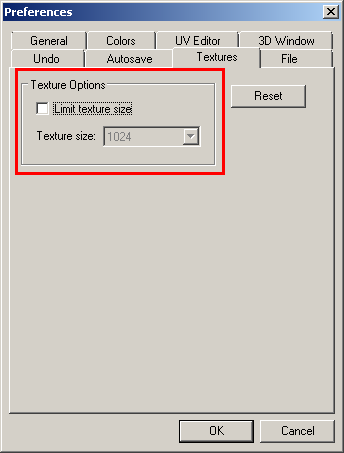
When repainting large textures, always remember to turn off texture size limits in Options -> Preferences, otherwise your texture may be repainted at a lower resolution:
Repainting Tips
- Make sure your UVs are not overlapping.
- Try to avoid very thin or narrow UV faces at the UV seam. This may create precision errors while rendering.
- Turn off texture size limits in Options -> Preferences when repainting large textures.
That's it! If you have any other questions about repainting seams, please let us know.